I love lavender: the plant, the flower, the scent, the memories it evokes. I love rubbing an old-world lavender plant between my hands and inhaling the wonderful floral-citrus aroma of the leaves and flowers.
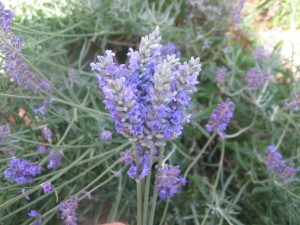
What better way to celebrate this love, and keep the scent with me year-round, than to make a heart out of flowering lavender stems. I can’t remember where I got the idea for making lavender hearts, and I don’t pretend to have invented the craft, but I present here the steps I use to create my lavender hearts, with a few tricks I have developed over time to make it easier and more stable.
Supplies
- 8-12 flowering lavender stems (even number)
- 5 feet of ribbon (cut into one 4′ and two 6″ lengths)
- two clothes pins or clips
It’s best to pick the flowers before they have opened, and preferably early in the day. Of course I missed my window, so these heads have bloomed, and are therefore bulkier. They still smell lovely, and I’m sure the scent will last. I used 12 stems for this heart.
Arrange the stems with the base of the flower heads staggered to create a lovely arrangement and decide what will be the front of the arrangement, or bouquet.
Fold the 4′ strand of ribbon in half and tie it around the base of the flower heads, like so:
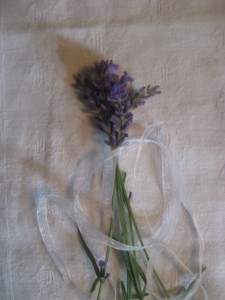
Tie a double-knot, not too tight, and slip the knot to the back of the bouquet.
Separate the stems into three sets, with two in the middle, and an even number on either side, for example if you have eight stems, you would put three on each side and keep two in the middle.
Wrap one strand of ribbon around one set of stems and clip it so it doesn’t come unravelled. Wrap the other strand around the other set of stems and clip it. Leave the two stems in the middle unwrapped.
The arrangement will look like this:
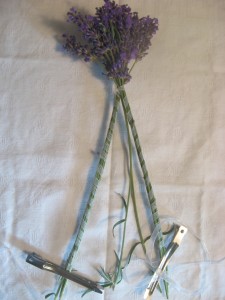
Using thin pliers, gently crush the base of the two unwrapped stems so that they don’t break when you bend them, and fold them over the back of the bouquet (180 degrees) so that they are pointing in the same direction as the flowers.
Carefully bend each wrapped stem up over the flowers until they cross over in front of the two unwrapped stems. Grab all three sets of stems like this (view from the back):
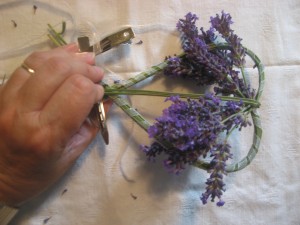
Here’s where those two middle stems come in. Pull the two middle (unwrapped) stems up or down to create as much curve in the heart as you would like. In previous years, when I didn’t have the middle stems, the heart had a tendency to twist out of shape, and it tended to be long and thin. With the addition of the two middle stems, my hearts are fuller and more stable.
Now, using one six-inch strand of ribbon, tie it around the base of the heart, at the intersection of the three sets of stems. In the photo above, this would be the point just above my index finger. Tie a double-knot, but not too tight or the stems will twist. Trim off the ends of the 6″ ribbon so you can’t see them.
Unclip the ribbons from the wrapped stems (the double-knotted 6″ ribbon will keep them from unravelling) and unwrap them up to the tied part. Wrap them around the stems, at least once, and bring them to the front of the heart; this part is inexact, do your best, the stems are already secure, you’re just trying to make it pretty at this point. Tie the two ribbons into a bow, then do a double knot so the bow doesn’t come undone. You can still adjust the middle stems to get the shape you want. Place the heart flat on the table and pull the flower heads out and arrange them as desired. Adjust everything until it is juuuust right.
Use scissors to trim the ends of the stems and ribbon.
Take the second piece of six-inch ribbon and loop it around the top so you can hang the heart in a special place. I just placed the ribbon at the back of the heart and threaded one end through each side, then tied an overhand knot
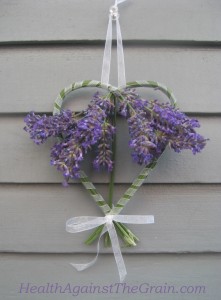
And there you have it. A beautiful lavender heart to share.
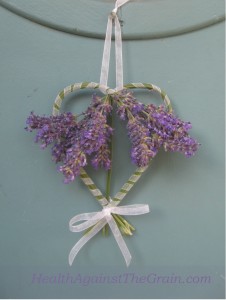
I gave this heart to my neighbour, as a thank you for letting me cut some of the lavender outside her door. She divided her bush one spring and gave me a plant, but with my black thumb, it never did grow, so I’m back to begging her for stems. The photo above is the lavender heart hanging on her door: thank you Hilary.
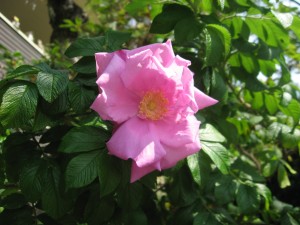
And here is a scented rose from my garden. Just because I love scented plants.
I live in Vancouver, where lavender grows abundantly. Last weekend, I made my first heart of the season with wild lavender I picked from an abandoned lot, but the photos didn’t turn out and I didn’t have the right kind of ribbon, so I started again with Hilary’s lavender.
I also love lavender because of its connection to France. My paternal ancestors came from France, and I feel a strong affinity to the country, its history and customs, its food, language, culture. My husband and I visited in 1993, and our hope is to some day bring the kids there. My heart is in France.
Last summer, we didn’t get to France, but we did find an abundance of lavender. In Kelowna, we visited Okanagan Lavender and Herb Farm on our road trip to Calgary for my niece’s wedding. It was a magical experience. I learned a lot about the different varieties and scents of lavender. And I’ve never seen so much lavender in one place. I encourage you to visit if you’re ever in the area.
Let me know if this craft works for you, and post or send me a picture of your lavender hearts. By this time next year, I expect to see a profusion of lavender hearts on Pinterest.
Love, Theresa

 If you are one of the